- Two bags of Deep River Potato Chips -- I think we had these in New York, though I'd never seen the Aged Cheddar Horseradish flavor
- A Nate's Yankee Bar -- jam-packed with cranberries, and not too sweet
- Honey Ginger Crystals -- not local; from China, I believe, and I'm really looking forward to finding these for myself
- Savor Nicasia cookies -- we all loved these little guys, which are flavored with lemon, rosemary and sea salt...even Guinness
Showing posts with label Cooking. Show all posts
Monday, October 1, 2012
another delivery
Can't believe month two of the Foodie Pen Pal exchange is already over! It's been so busy. This time, my sender was Roxanne from Connecticut. She sent lots of goodies from her home state:
Friday, August 31, 2012
foodie penpal reveal!
In late July, my foodie friend Sarah told me about an online program she'd discovered called Foodie Penpals that's run by Lindsay of the Lean Green Bean. Some of you might know that as a kid, I had several pen pals, and I still love to write -- and receive! -- letters and postcards today (Izzy and I have been writing since we were 6 and 7). The idea that I could have another pen pal paired with a mystery package of yummy foods was enough to make me hop in line. Well, today's the big reveal, when all the Foodie Penpals bloggers post about what they received this month.Friday, July 13, 2012
we grew this! eastern eggs florentine
I guess it was around Memorial Day that Ian and I planted our veggie garden, this nice 6x8 raised bed that the previous homeowners installed. We're using the Square-Foot Gardening technique in hopes that we'll be able to grow more types of produce than we otherwise would using the row technique. So far, it's working fabulously well, and even though we're experiencing severe drought (are you sick of hearing about this yet?), things are growing really well -- including our bok choi, an Asian cabbage that looks kind of like a mix of celery and chard, shown here in the center right soon after it was planted.
Thursday, September 8, 2011
late-summer salad
I normally don't report on the meals I throw together when Ian is at work, but this one is too good to keep to myself. I've dubbed it Late-Summer Salad: It's chock-full of in-season produce and tossed in an Asian-inspired dressing to give it that exotic, vacation-y flair. Bonus: According to Lose It (my calorie-counting app), it has a mere 236 calories. It would be a terrific accompaniment to salmon, barbecue chicken or a pork chop.
ingredients
1/4 c. dry bulgur wheat
1/2 c. cold water
1 c. cucumber, peeled and chopped
1 medium peach, chopped
1 c. fresh spinach, roughly chopped
1 green onion, minced (white parts)
2 Tbl. Newman's Own Low-Fat Sesame Ginger dressing
directions
1) Put bulgur and water in a sauce pan. Bring to a boil and allow to simmer for 12 minutes. Spoon into a salad bowl.
2) Add all other ingredients to the bowl and toss.
3) Eat!
Late-Summer Salad
(serves 1)
ingredients
1/4 c. dry bulgur wheat
1/2 c. cold water
1 c. cucumber, peeled and chopped
1 medium peach, chopped
1 c. fresh spinach, roughly chopped
1 green onion, minced (white parts)
2 Tbl. Newman's Own Low-Fat Sesame Ginger dressing
directions
1) Put bulgur and water in a sauce pan. Bring to a boil and allow to simmer for 12 minutes. Spoon into a salad bowl.
2) Add all other ingredients to the bowl and toss.
3) Eat!
Friday, July 23, 2010
something else
One of the places in New York we miss dearly is Recipe, a restaurant a few blocks from our apartment. The place is adorable, with rustic and vintage decor, and has incredible locally sourced food (and, oh, the Manhattans...). I didn't think I'd care for them, but the pickled veggies served as a sandwich side became something I always looked forward to. When we found cucumbers, carrots, and baby turnips in our CSA box, I knew I had to try to make some for myself. So last night, while most Milwaukeeans were bailing out their basements, I was tinkering with a recipe from Cooking Light and coming up with my best (okay, only) pickled veggies ever. And they're a lot like Recipe's!
pickled veggies
fills a 1-liter jar
ingredients
1 tsp. dill
1 tsp. tarragon
1 tsp. crushed red pepper
1 Tbl. Dijon mustard with whole mustard seeds
1 c. white vinegar
1 c. white wine vinegar
3/4 c. sugar
1 tsp. salt
2 medium cucumbers, sliced into 1/8-inch-thick rounds
3 medium carrots, peeled and sliced into sticks
2 baby turnips, peeled and quartered
1/2 small onion, sliced lengthwise
1 large chili pepper (seriously, that's what they were called at Stein's, where I bought the plant), seeded and sliced lengthwise
6 cloves garlic, peeled and pierced
directions
1. Pop dill, tarragon, and crushed red pepper in a tea ball. Smear Dijon in another tea ball.
2. Place the tea balls in a small saucepan, and add the vinegars, sugar, and salt. Bring to a boil over medium-high heat.
3. Meanwhile, arrange veggies in a jar that seals tightly.
4. Once the liquid comes to a boil, pour the mixture (including the tea balls) over the veggies and seal the jar. Allow to cool somewhat before refrigerating. Remove the tea balls after the pickling action has gone on overnight. Enjoy!
note
Try other veggies here, too, like squashes (summer squash and zucchini slices, baby pattypan, etc.) and radishes.
What else would be good?
Thursday, July 22, 2010
expectedly delicious
We made pizza -- or, dare I say, we invented something a lot like it. Honestly, it will take a crazy-good margherita to bring me back to the fold of classic pizza aficionados. The whole thing was brought about by last week's CSA box, which contained large amounts of produce we don't eat on a regular basis: mustard greens, baby beets, and zucchini. We supplemented these goodies with onions (caramelized in honey and lemon juice), bacon (a great friend of mustard greens), mozzarella, goat cheese, and healthy shots of salt and pepper; then, sprinkled everything on top of this dough and baked it 'til it smelled good. Wowie wow wow.
Now it's your turn. Next time you're at the farmers' market, get a bunch of stuff, prep it with complementary seasonings, throw it together over some pizza dough, and see what you get. I can (almost) guarantee you'll love it.
Have you done this? Do tell!
Sunday, April 4, 2010
Wednesday, March 31, 2010
piece of cake
These beautiful days have me craving warm-weather food. Last Sunday, for a family dinner, I made a Pisticci-inspired coconut cake with cream cheese frosting -- from scratch. The process didn't turn out to be a piece of...you know. The recipes were both fairly simple, but by the time we'd (yep, the whole family pitched in!) figured out how to shave the coconut, my sunny mood was overcast. But then I tasted it.
I don't want to discourage you from making coconut cake for, say, Easter -- but if you decide to, make sure to schedule plenty of time. I'd probably prep the coconut first. Cooking Light's directions do a great job of explaining how to drain and crack it (but, unfortunately, they aren't online yet, so I suggest these):


I don't want to discourage you from making coconut cake for, say, Easter -- but if you decide to, make sure to schedule plenty of time. I'd probably prep the coconut first. Cooking Light's directions do a great job of explaining how to drain and crack it (but, unfortunately, they aren't online yet, so I suggest these):
- Draining: After heating the coconut, take it, along with a hammer and a clean nail, outside so as not to ruin your in-laws' brand-new granite counter tops. Then find the eyes of the coconut (it has three indentations in a clover-leaf shape). Balance the coconut on a hard surface, and gently hammer the nail into each of the three eyes. You'll need to wiggle the nail around a bit in each hole so there's enough air circulation for drainage. Once the holes are a quarter-inch wide, let the coconut water drip into a measuring cup. When the water stops flowing, shake the coconut and listen for more. If you hear splashing, you might need to widen the holes. When the coconut is dry, pour the water through a sieve to remove any bits of shell or coconut hair.

- Cracking: Wrap a clean dish towel around the coconut, then bludgeon it with a hammer. You'll hear a dull crack when the shell breaks. You may need to pry it open with the hammer's claw. Rinse off the coconut when you get inside.


...But Cooking Light stops there, leaving you to your own devices for shucking, shaving, and toasting. Here's some help:
- Shucking: With a sharp knife, score the coconut meat every couple of inches. Then, insert a fork between the shell and the light-brown papery stuff on the meat and pry off the meat piece by piece.
- Shaving: If you want smaller shreds, use a veggie peeler to trim off the light-brown papery stuff, then use a hand-crank grater. If you'd rather have wide curls, use a veggie peeler -- no need to remove the brown stuff.
- Toasting: Sprinkle coconut shavings onto a rimmed baking sheet. Toast in a preheated, 350-degree oven for 5 to 10 minutes, stirring occasionally for even browning.
The trouble is worth it (especially if you use the tips above). Enjoy!

What are your go-to spring recipes?
Sunday, December 6, 2009
a jolly-good fellow
Ian celebrated his birthday on Thursday. He isn't big on birthdays, but I went to Pisticci to surprise him with a treat anyway. I secretly baked yellow cupcakes (his favorite) the night before and frosted them with homemade chocolate frosting before leaving for the restaurant. His coworkers are such a great group. And since most of them have connections to the Manhattan School of Music, their rendition of "Happy Birthday" was one of the most amazing ones I've heard (in at least six-part harmony!).
The frosting was fantastic...it tastes a million times better than the stuff you get in a tub at the supermarket. And it's quite simple. Try this:
chocolate frosting
modified from the America's Test Kitchens Family Baking Book recipe
(makes enough to cover 24 cupcakes or a 9" x 13" sheet cake)
ingredients
8 oz. chocolate, finely chopped (I used 3 oz. unsweetened and 5 oz. bittersweet)
3/4 cup heavy cream
3 Tbl. light corn syrup
1/8 tsp. salt
1 cup powdered sugar
1 1/2 tsp. vanilla extract
1 1/2 sticks butter, softened and cut into chunks
directions
1. In a small saucepan, bring the cream, corn syrup, and salt to a boil, whisking often. Once boiling, remove from heat.
2. Whisk the chocolate into the cream mixture and stir until smooth.
3. Add the sugar and vanilla and beat with an electric mixer on medium speed for about 30 seconds. With the beaters still running, gradually add the butter until the mixture looks like pudding, about 2 minutes.
4. Transfer to a small bowl, cover with plastic wrap, and put in the freezer. Stir the mixture every 10 minutes until the mixture reaches a smooth, thick, spreadable consistency; about 30 minutes.
5. Frost away.
Notes: I had just a dozen cupcakes, so I put the remaining frosting back in the freezer. So far, so good. We used some of it last night as the flavoring for hot chocolate. It was absolutely delicious. So give that a go too.
Do you have a go-to birthday dessert recipe? What is it?
Sunday, October 18, 2009
chili night
Chili is one of those foods I crave for days -- probably because I think about it until I actually have time to make a batch (rare these days). Ian must have been tired of hearing about it, because he finally suggested we make a recipe we'd tried last year and loved (good thing I never throw away my cooking magazines). Saturday was dreary, and the perfect time to putter around the apartment while the chili perked in the slow cooker. He even had the ingenious idea to invite some friends over to enjoy it with us (it feeds a crowd). So what could have been a drizzly, boring Saturday ended up being quite fun while we got ready for Candice and Bryan's visit.
The night was a huge hit -- chili included. If you have a slow cooker, I highly recommend you make this. It freezes well too, so you can put that craving to rest in minutes.
Smoky Slow Cooker Chili
modified from this Cooking Light recipe
(serves 8 hungry people)
Our changes:
- Use pork loin instead of pork shoulder
- Swap in 3 medium onions for the 3 cups
- Use 3 poblano peppers instead of a green pepper (if you want extra heat)
- Sub 7 oz. tomato sauce and a chopped serrano pepper instead of the spicy tomato sauce (we couldn't find it)
For sides, Ian baked corn bread and I threw together the tangy mandarin orange salad that both of our moms make. Yum yum yum.
The night was a huge hit -- chili included. If you have a slow cooker, I highly recommend you make this. It freezes well too, so you can put that craving to rest in minutes.
Saturday, September 12, 2009
a spin on shakes
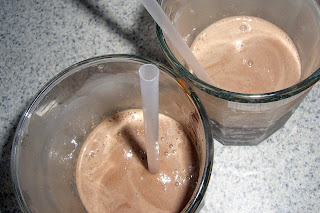
A couple of days ago, I was listening to a Here on Earth podcast all about milkshakes. Jean Feraca was interviewing food writer Adam Ried, who's just written a cookbook devoted to none other than shakes. The podcast stuck with me, so I finally gave in and made a batch for dessert.
Several of Ried's concoctions sounded delicious, but one in particular caught my attention: a Mexican chocolate shake. This isn't the typical mixture you'd find at an old-fashioned soda fountain...it includes cayenne pepper, an ingredient that appears in the ancient Aztec chocolate recipes. Unfortunately, he didn't divulge any recipes on the show, so I had to figure it out. One tip he mentioned turned out to be the key: Instead of using chocolate syrup, he uses chocolate sorbet for its ultra-concentrated flavor. Here's what I came up with:
ingredients
1/3 cup vanilla sorbet
1/3 cup chocolate sorbet
2 Tbl. milk
Splash of vanilla
A few shakes of ground cinnamon
A tiny pinch of cayenne pepper
directions
1) Combine ingredients in glass and blend with an immersion blender (or combine in a blender jar), pulsing until smooth.
2) Enjoy.
Several of Ried's concoctions sounded delicious, but one in particular caught my attention: a Mexican chocolate shake. This isn't the typical mixture you'd find at an old-fashioned soda fountain...it includes cayenne pepper, an ingredient that appears in the ancient Aztec chocolate recipes. Unfortunately, he didn't divulge any recipes on the show, so I had to figure it out. One tip he mentioned turned out to be the key: Instead of using chocolate syrup, he uses chocolate sorbet for its ultra-concentrated flavor. Here's what I came up with:
Mexican Chocolate Shake
(serves 1)
ingredients
1/3 cup vanilla sorbet
1/3 cup chocolate sorbet
2 Tbl. milk
Splash of vanilla
A few shakes of ground cinnamon
A tiny pinch of cayenne pepper
directions
1) Combine ingredients in glass and blend with an immersion blender (or combine in a blender jar), pulsing until smooth.
2) Enjoy.
They turned out pretty darned good. It won't become my all-time favorite, vanilla, but it was a great dessert after chipotle chicken fajitas!
Here's what I was thinking about a year ago: a few of my favorite things.
Monday, September 7, 2009
fresh-squeezed
So Ian and I finally ventured inside our neighborhood's new Whole Foods store, something we swore we'd never do. We'd subscribed to the "whole paycheck" moniker that people (even many around here) use. But we were amazed to find that it wasn't a rip-off. In fact, it may be the most reasonably priced grocery in our neighborhood. Of course, some of the specialty items were insanely expensive, but they're specialty items. I was particularly excited about the fruits and veggies, and Ian loved the beer selection. He bought a can of Dale's Pale Ale from Oskar Blues Brewery. I'd been craving lemonade and we found a bag of lemons for $3. Bingo.Fresh-squeezed lemonade is so quick and easy. I learned how to make it when I worked for my Aunt Ces at her coffee stand, Cespresso. Every Saturday all summer long, I'd squeeze lemons for a constant stream of farmers' market and art fair customers demanding our lemonade (and coffee and mochas and iced chais...). It was the best.
I happen to like the tart stuff, so here's how I put it together. If you like it a little (or a lot) sweeter, you know what to do!
Fresh-Squeezed Lemonade
(serves 8)
ingredients
10 lemons
4 squeezed lemon halves
2/3 cup sugar
Water
Ice
directions
1) Chop lemons in half and juice them using a citrus reamer or a fork (just jam it in there and twist). I squeeze them over a mesh strainer set in a 2-cup measure. It keeps the seeds out, but a bit of pulp does get through. If you like super-pulpy lemonade, just scoop some out of the strainer. Otherwise, discard the pulp and most of the lemon halves once you've got about 1 1/2 cups of juice. You may have to clean out the strainer a few times depending on how zealously you squeeze.
2) Toss four squeezed lemon halves into a 2-quart pitcher. Add the sugar. Pour in lemon juice and top with cold water until the pitcher is filled. Stir well.
3) Serve over ice. (Garnish with lemon slices, mint leaves, raspberries, gin, whatever's on hand.)


Sunday, August 23, 2009
it's delectable, it's delovely
Yesterday afternoon, we treated ourselves to a movie at the theater (hey, they have functioning AC...can you blame us?). Julie & Julia was a wonderful distraction from the super-humid, drizzly day. We both would've been happy with a movie only about Julia, but the Julie part wasn't that bad, and it was fun to see random parts of NYC that we recognize...and she's a blogger. What's not to love?
The movie inspired us to make something exciting for supper (shocking, right?), and we had just the thing...in our freezer. A few weeks back, we made ravioli from scratch. My folks gave us this cool ravioli mold as a gift last spring, and we wanted to put it to the test. It worked flawlessly (not one ravioli blew up in the water!) and the pasta was delicious. Much to our delight, the original batch had such a high yield that we were able to freeze half (just pop raw ones in a Ziploc freezer bag, nothing fancy or complicated). When we cooked them up last night, they turned out just as well as their counterparts had in their debut.
So here's how we made the ravioli...the ravioli recipe was inspired by America's Test Kitchens. We threw together the sauce ourselves.
For the filling:
ingredients
1/2 cup part-skim ricotta cheese
1/2 oz. Parmesan cheese, grated
1 oz. low-fat, pre-shredded mozzarella cheese
1 egg yolk (set aside the white, you'll need it later)
4 chives, minced
3 oz. prosciutto (we used 18-month aged), chopped
Salt and pepper, to taste
directions
Mix it all up and set aside.


The movie inspired us to make something exciting for supper (shocking, right?), and we had just the thing...in our freezer. A few weeks back, we made ravioli from scratch. My folks gave us this cool ravioli mold as a gift last spring, and we wanted to put it to the test. It worked flawlessly (not one ravioli blew up in the water!) and the pasta was delicious. Much to our delight, the original batch had such a high yield that we were able to freeze half (just pop raw ones in a Ziploc freezer bag, nothing fancy or complicated). When we cooked them up last night, they turned out just as well as their counterparts had in their debut.
So here's how we made the ravioli...the ravioli recipe was inspired by America's Test Kitchens. We threw together the sauce ourselves.
For the filling:
ingredients
1/2 cup part-skim ricotta cheese
1/2 oz. Parmesan cheese, grated
1 oz. low-fat, pre-shredded mozzarella cheese
1 egg yolk (set aside the white, you'll need it later)
4 chives, minced
3 oz. prosciutto (we used 18-month aged), chopped
Salt and pepper, to taste
directions
Mix it all up and set aside.
For the pasta (sorry, no photos):
ingredients
2 cups all-purpose flour, plus extra as needed
3 large eggs, beaten
Water
directions
1. On a cutting board or clean counter, form the flour into a mound. Make a little well on top and pour the eggs into it. Rough it up with your fingers until the dough looks like little peas.
2. Add water, 1/2 tsp. at a time, and start forming the dough into a ball. If it starts to get sticky, add a pinch of flour.
3. Knead the dough until it's smooth, about 2 minutes. Set aside and allow to rest for about 15 minutes.
ingredients
2 cups all-purpose flour, plus extra as needed
3 large eggs, beaten
Water
directions
1. On a cutting board or clean counter, form the flour into a mound. Make a little well on top and pour the eggs into it. Rough it up with your fingers until the dough looks like little peas.
2. Add water, 1/2 tsp. at a time, and start forming the dough into a ball. If it starts to get sticky, add a pinch of flour.
3. Knead the dough until it's smooth, about 2 minutes. Set aside and allow to rest for about 15 minutes.
For the sauce:
ingredients
5 red and yellow tomatoes, cored, seeded, and diced
A good handful of basil, cut into strips (I rolled them in a chiffonade and used a scissors to make this easier)
3 cloves garlic, minced
Salt and pepper, to taste
directions
While the dough rests, mix up all the sauce ingredients and set aside.
ingredients
5 red and yellow tomatoes, cored, seeded, and diced
A good handful of basil, cut into strips (I rolled them in a chiffonade and used a scissors to make this easier)
3 cloves garlic, minced
Salt and pepper, to taste
directions
While the dough rests, mix up all the sauce ingredients and set aside.
Assembling the ravioli:
ingredients
A pinch of salt
1 egg white
directions
1. Fill a large saucepan with water, throw in a pinch of salt, and turn up the burner to high.
2. After your dough has rested, roll it out on a floured cutting board or counter top.
3. Once it's about 1/8 of an inch thick, lay a sheet of it over the ravioli mold. Press the bubbly white thing over the top to make the pockets for the filling.
4. Spoon about one Tbl. of the filling into each pocket. Brush egg white around the edges of the pockets and cover with another sheet of pasta. Press down to seal and cut the edges. Gently flip the mold to remove the ravioli. Set them on a baking rack to dry for a little while (10 minutes, maybe).
5. Once the pasta feels a little bit cool and dusty, drop the ravioli into the boiling water and allow it to cook for around 4 minutes (they'll float, and will look bumpy). Fish them out of the water, top with sauce, and serve immediately.
ingredients
A pinch of salt
1 egg white
directions
1. Fill a large saucepan with water, throw in a pinch of salt, and turn up the burner to high.
2. After your dough has rested, roll it out on a floured cutting board or counter top.
3. Once it's about 1/8 of an inch thick, lay a sheet of it over the ravioli mold. Press the bubbly white thing over the top to make the pockets for the filling.
4. Spoon about one Tbl. of the filling into each pocket. Brush egg white around the edges of the pockets and cover with another sheet of pasta. Press down to seal and cut the edges. Gently flip the mold to remove the ravioli. Set them on a baking rack to dry for a little while (10 minutes, maybe).
5. Once the pasta feels a little bit cool and dusty, drop the ravioli into the boiling water and allow it to cook for around 4 minutes (they'll float, and will look bumpy). Fish them out of the water, top with sauce, and serve immediately.
Sunday, August 9, 2009
operation clambake
Last night we had the pleasure of getting together with our friends, Candice and Bryan. We met for beers at our favorite new bar, The Pony Bar, and then headed back to their apartment for an at-home clambake.
A couple of weeks ago, Candice asked me if I'd ever done a clambake -- I hadn't. So she experimented with recipes and invited us over once she'd developed a good one. I helped her this time, and it was so easy. We filled a big pot with clams, mussels, shrimp, corn, chicken broth, and a little butter. Then we put on the lid and boiled it for about half an hour.


Meanwhile, Candice, Bryan, and I prepped the rest of the food while Ian made friends with their cat, Shadow.


We lugged it and the rest of our meal (French potato salad, asparagus, rosemary bread, and Prosecco) down to the fourth-floor observation deck and dug in!


It was the perfect night for eating al fresco. We had gorgeous weather, a great location, delicious food, and best of all, fantastic company!
A couple of weeks ago, Candice asked me if I'd ever done a clambake -- I hadn't. So she experimented with recipes and invited us over once she'd developed a good one. I helped her this time, and it was so easy. We filled a big pot with clams, mussels, shrimp, corn, chicken broth, and a little butter. Then we put on the lid and boiled it for about half an hour.
Meanwhile, Candice, Bryan, and I prepped the rest of the food while Ian made friends with their cat, Shadow.
We lugged it and the rest of our meal (French potato salad, asparagus, rosemary bread, and Prosecco) down to the fourth-floor observation deck and dug in!
It was the perfect night for eating al fresco. We had gorgeous weather, a great location, delicious food, and best of all, fantastic company!
Sunday, July 12, 2009
playing with food

This weekend has been particularly notable because Ian and I have managed to finish furnishing our apartment! If I haven't told you, there's a lovely peninsula in the kitchen that serves nicely as a bar. When we signed on this place, we sold our beloved table and chairs and purchased a set of saddle-seat bar stools instead. They finally arrived on Friday, and we put them together yesterday. Now that they're in use, we can once again prepare and eat messy foods (God forbid we get a stain on our new couch!). This prompted tonight's supper: Ian's Beef Teriyaki with Broccoli and Noodles. It's his adaptation of America's Test Kitchens' Beef Teriyaki recipe which can be found in their Family Cookbook. It's absolutely delicious, not to mention cost-effective, quick (30 minutes, start to finish!), and relatively healthy. I highly recommend you get out a pen and paper now or print this blog entry. You'll use it. Promise.
beef teriyaki with broccoli and noodles
serves 2
ingredients
4 oz. or 2 servings of rice noodles (we use the straight cut noodles from A Taste of Thai)
For the sauce:
1/2 cup soy sauce
1/3 cup sugar
2 Tbl. sherry (the real stuff; not what you can get at the grocery store), or dry white wine in a pinch
2 tsp. grated ginger
2 garlic cloves, minced
1/2 tsp. cornstarch
Red pepper flakes, to taste (we use about 1/2 tsp.)
For the steak:
1/2 Tbl. olive oil
1/2 lb. flank steak
Salt and pepper, to taste
For the broccoli:
1 bunch of broccoli (about 3 small heads, including stems), chopped
1/4 cup water
directions
1. Make noodles according to package instructions for stir fry (soak in a bowl of hot water for 20 to 30 minutes while you prepare the rest of the meal).
2. In a small bowl, whisk together sauce ingredients; set aside.
3. Pour olive oil into medium nonstick skillet. Heat to medium-high.
4. Thinly slice flank steak (against the grain) and season with salt and pepper. Add to heated skillet. Saute until done, about about 2 minutes per side. Remove from pan and set aside. Return skillet to burner.
5. Add broccoli and water to skillet. Reduce heat to low and cover until broccoli is bright green, about 5 minutes. Remove lid and continue to cook until broccoli is tender and water is almost entirely evaporated, about 5 minutes. Set broccoli aside with beef and return skillet to burner.
6. Increase heat to medium, re-whisk sauce and add to skillet. Cook until slightly thickened, about 3 minutes. Drain noodles and add to sauce. Stir and cook for 2 minutes. Toss in beef and broccoli. Allow to cook until noodles are al dente and ingredients are heated through.
7. Serve. Accompany with Red Bicyclette Chardonnay (or Pinot Noir!), Diana Krall, and 2 pairs of chopsticks.
P.S. On an entirely different topic, we have a new roommate, Domingo the Mouse. Does anyone have any tips on getting rid of him? We are currently using traps baited with peanut butter, and no luck. I refuse to use a glue trap. Talk about inhumane...
Thursday, January 15, 2009
a culinary experiment
After our recent trip to Lupa with our friends Jim and Bob, plus a new Mario Batali cookbook for Christmas, Ian decided it was high time he tried to make some fresh pasta.
fresh fettuccine
(adapted from Mario Batali's recipe on FoodNetwork.com)
serves 8
serves 8
ingredients
4 extra large eggs
3 1/2 cups unbleached all-purpose flour plus 1/2 cup for dusting your work surface
directions
Make a mound of the flour in the center of a large wooden cutting board. Make a well in the middle of the flour and add the eggs one at a time. Using a fork, beat together the eggs and begin to incorporate the flour starting with the inner rim of the well. As you expand the well, keep pushing the flour up to retain the well shape. Don't worry that this initial phase looks messy (and it totally is!). The dough will come together when half of the flour is incorporated. 
Start kneading the dough with both hands, using your palms. Once you have a cohesive mass, remove the dough from the board and scrape up any leftover crusty bits; discard. Lightly flour the board and continue kneading for 3 more minutes. The dough should be elastic and a little sticky. Continue to knead for another 3 minutes, remembering to dust your board when necessary. Wrap the dough in plastic and allow to rest for 30 minutes at room temperature.
Note: Do not skip the kneading or resting portion of this recipe. They are essential for a light pasta.
Roll out pasta to about 1/8-inch thick, or use the thinnest setting on a pasta machine if you're lucky enough to have one! Cut pasta into 1/4-inch thick noodles by hand (or with the machine) and set aside. (Some prefer to set under a moist towel, others hang dry.)


Assemble the ingredients for the sauce (we used a combination of red onion, jalapeno peppers, garlic, lemon, butter, and Parmesan cheese found in Molto Italiano).
Bring six quarts of water to a boil and add 2 Tbl. salt. Drop pasta into boiling water and cook until tender yet al dente. Drain pasta well and toss into pan with sauce mixture. Serve immediately in warm bowl, making extra cheese available on the side.
Eat. It's delicious, and not terribly difficult. The entire process took only two hours and isn't extremely labor-intensive, so you can even do other things, say, laundry, in the meantime. Plus, I was able to portion out several days' worth of lunches. You'd never imagine the peppers, lemon, and cheese would complement one another, but they absolutely do. We'll definitely make this again.

Start kneading the dough with both hands, using your palms. Once you have a cohesive mass, remove the dough from the board and scrape up any leftover crusty bits; discard. Lightly flour the board and continue kneading for 3 more minutes. The dough should be elastic and a little sticky. Continue to knead for another 3 minutes, remembering to dust your board when necessary. Wrap the dough in plastic and allow to rest for 30 minutes at room temperature.
Note: Do not skip the kneading or resting portion of this recipe. They are essential for a light pasta.Roll out pasta to about 1/8-inch thick, or use the thinnest setting on a pasta machine if you're lucky enough to have one! Cut pasta into 1/4-inch thick noodles by hand (or with the machine) and set aside. (Some prefer to set under a moist towel, others hang dry.)


Assemble the ingredients for the sauce (we used a combination of red onion, jalapeno peppers, garlic, lemon, butter, and Parmesan cheese found in Molto Italiano).
Bring six quarts of water to a boil and add 2 Tbl. salt. Drop pasta into boiling water and cook until tender yet al dente. Drain pasta well and toss into pan with sauce mixture. Serve immediately in warm bowl, making extra cheese available on the side.
Eat. It's delicious, and not terribly difficult. The entire process took only two hours and isn't extremely labor-intensive, so you can even do other things, say, laundry, in the meantime. Plus, I was able to portion out several days' worth of lunches. You'd never imagine the peppers, lemon, and cheese would complement one another, but they absolutely do. We'll definitely make this again.
Subscribe to:
Posts (Atom)